Tuesday, November 8, 2011

Happy Belated Halloween!

 Well it has been a few months since I have posted and it took awhile to figure it out again. But back in business.

I posted these pumpkins once before but I love them. Brought them out to make the house festive.
Basically they are scalloped circles cut with Nestabilities and embossed. Fold in half and glue the 8 circles together at the center. The stem is a stick  from the backyard hot glued on. The rest is silk flowers and a paper vine.
 
This started as a paper mache box from Michael's papered with Halloween paper from We R Memory Keepers. The lid was papered with orange paper and orange glitter. The top is 2 crepe paper rosettes. The black fringe circles the bottom and center of rosettes. The star is suspended with wire and black paper.

The witches hat is a papier mache cone wrapped in paper from We R Memory Keepers. So easy and  fun! HAPPY HALLOWEEN!

Monday, June 27, 2011

Greeting Farm

Greeting Farm stamps are fun to color and use on cards or any paper project. Here I used a block of wood that is about 4" square. I painted it white with acrylic paint. The wood is rough so much of the paint soaked in leaving a nice texture. I covered the painted wood with  paper from Lasting Impressions.
It is hard to see but there is a Maya Road frame covered with glitter behind the stamped image (named Snuggle) and behind that is lace. The blue flower is painted metal and the lavender rose buds are fabric.
Add a sentiment to give it function.

Two different uses of wood and stamps.

Friday, June 10, 2011

Paper Flowers

Love, love, love to make flowers. These are made using Donna Salazar's new flower dies (Rose and Carnation). A while back I purchased a ream of paper at Kelly's Paper off their clearance table (I'm a paper junkie) that is heavy but not quite card stock,  cream in color with a shinny surface. One day I was playing around with the flower dies and soon realized that the white on white looked cool. Only used the paper originally because I had sooo much on hand.
The background is a tag made from cardboard from an old box painted with white paint. The vine is  Sizzix Vine with Leaves die (leaves cut off), And there you have it.

To see more flowers made with colored/printed cardstock see post below Festive Friday post.


Thursday, May 26, 2011

Festive Friday

Welcome to another Festive Friday Blog Hop. This is number 10. If you came from Carol's blog you are in the right place. Thank you for continuing on.

This week I made an easel card. (See Splitcoast Stamper's web site for directions and measurements.) The image is colored with colored pencils, cut out and layered with Graphic 45 Christmas paper.

Supplies:
Hero Arts Stamp Collage Merry Christmas
Graphic 45 Christmas Past Collection
Black card stock
Martha Stewart holly punch
Martha Stewart edge punch

The flowers are from Michael's. I bought a stem of silk flowers that were the size and color I needed (the cost was $1.09). I took the flowers apart, glued them together, and added a gold pearl to the middle. Viola!

Thank you again for stopping by. This is the last stop - so if you did not start with Terri's blog you may want to continue on and see what Terri and other's have posted.


Sunday, May 22, 2011

Spring Time Photo Album

 My husband travels a lot and I am retired and that equals lots of time on my hands. I have my favorite blogs I like to visit and I was inspired by Pieces of Home Design. She had made a beautiful Easter Album. So I looked at what I had available in my stash of paper, ribbon, etc. and got to work. I had sooo much fun. What made it easy was buying 6"x6" paper pads that were color coordinated.  
 The flowers I made using Tim Holtz's Tattered Floral die. I also bought some silk flowers at Michael's, took them apart, sprayed them with Tattered Angels Glimmer Mist to match the colors of the album.
 Each page has a tag and of course a bow. And no page is complete without flowers, lots of flowers. The bird tag (colored with Copics) and the Favorite Finds tag I believe are Maya Road (???).

The back of the book is my favorite. It reminds me of toile fabric. I took Mary's (Pieces of Home Design) idea of using ribbon for the binding. I was skeptical that it would hold. Satin ribbon is durable and is holding up perfectly.

Wednesday, May 11, 2011

Festive Friday


Welcome to Festive Friday #9. You probably came from Katie's beautiful and very creative blog. I am so glad she is able to join the Festive Friday Blog Hop again. She has been missed.

This time I wanted to do a tag instead of a card. This tag is larger than most (5"x8"). I drew out the shape and traced it on light blue tag and Melissa Francis paper called Ginger. The angel and snow men (on the back) are from Crafty Secrets.

This is the back of the tag. It has a pocket and a smaller tag inside. Can't have enough tags, bows, and flowers on a project.

Thank you for stopping by. Please look around my blog if you are so inclined.

If you did not start at the beginning please continue on to Terri's blog. She has great ideas and a gift for giving great directions to her projects. It is very inspiring to see all the creativity and unique ideas. Hope you enjoyed the blog hop.

Monday, May 9, 2011

Trying New Things

 I love anything Wendy Vecchi and wanted to try her new Clearly for Art Modeling Film. Using Tim Holtz's Tattered Floral die I cut out the pieces needed to make the rose. I then colored the petals with  Adirondack Alcohol Ink in Watermelon. The tricky part was curling the pedals without flattening previously curled petals.

Love the look of vintage and femine things. Tried my hand at a victorian looking cone. Spent lots of time on detail my camera could not capture.

Monday, May 2, 2011

Granddaughters Are A Gift

Last month Megan had her 7th birthday. She is the epitome of femininity and fun. She dresses like a princess but can play soccer with the best of them. This Greeting Farm stamp was perfect for her. Adding a little sparkle and her favorite color made it a card tailored to her.


Clara turned one in January. She quickly found out that presents are intriguing and fun. Here she was taking out the tissue paper and then checking to see if anyone was looking. She is so good natured and loving. You just want to hug her and never let her feet hit the ground. Love the tutu!!

I am not a scrapbooker but I wanted to try out for a design team and one of the items that needed to be submitted was a scrapbook page. It is fun to stretch yourself and rewarding. I did not make the team but it was still fun and I learned a lot.

Thursday, April 21, 2011

Festive Friday

Welcome back to another Festive Friday Blog Hop. I have missed the last 2 posts and it feels good to be back and taking a stab at being creative. There are so many talented crafters contributing to the blog I look forward to seeing what everyone has done.

 I found this Hero Arts stamp on sale (40% off) and couldn't resist. It's fun to color and the image is colored quickly. Making a card and gift tag takes no time at all.
 Supplies:
Hero Art Stamp
Spellbinders Classic Scalloped Circles - large
Graphic 45 Paper
Xmas Red & Gold Stickles

Thank you for stopping by. Hopefully this blog hop has inspired you to make a few Christmas cards.
If you came to this site from Leslie'sLeslie's blog you are in the right place. This is the last stop - so if you did not start with Terri's blog you may want to continue on and see what Terri and everyone else has posted.

Monday, March 14, 2011

Some of My Favorite Things


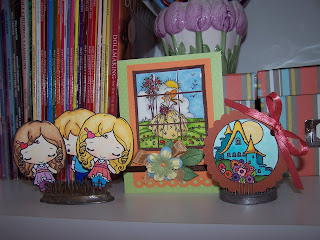
Card was made with Donna Salazar's paper. The green paper was embossed and edged with Martha Stewart's Cherry Blossom paper punch. The flower and leaves were stamped on felt and embellished with stickles. The banner is from Lawn Fawn. 


This pocket organizer was made using Studio 490 stamps. Ink was Distress Ink in Tea Dyed. Maya Road embellishments decorated the pages.

Thursday, March 10, 2011

Festive Friday

Thank you for visiting our Festive Friday Blog Hop. If you arrived here after visiting Yolanda's blog, welcome. Yolanda is amazing with a Circuit. She makes it look so easy.

A while  back I posted a card using the same technique and had fun doing it and wanted to try it again. This is where you stamp your image,
color, and cut it into 1" squares. At this point you cover the squares with Glossy Accents or Diamond Glaze. Let them dry and adhere them to cardstock. Love the look of looking through a window. The paper I used is Graphic 45 (plaid) and Tim Holtz (brown). The stamp is from Crafty Secrets Seasonal Friends.

This is the last stop. If you did not start at the beginning you can go to Terri's blog and see all the great cards from the beginning. Thanks again for stopping by.


Saturday, February 26, 2011

Working With Wood


Saw some wood blocks that were embellished with such creativity that I came home and rumaged through the garage and found this block of wood that measures about 4"X 5". I starded stamping, gluing, and tearing tissue paper. It was great fun. I realized that my finished product was an elementary type composition that you see in school. A house, next to a tree, with the sun shinning in the sky.

I do hope to find more wood - different shapes and sizes - and try this again. The goal will be to use the materials, color, and texture in a more interesting way.


Thursday, February 24, 2011

Festive Friday Blog Hop

Thank you for coming back and visiting our Festive Friday Bog Hop. You should have arrived here from Yolanda's blog.

Again I used ornaments made with Graphic 45 paper and Maya Road frames to make these cards. The house is made from a pattern in Lisa Pace's Vintage Christmas online class.

Appreciate your visiting. This is the last stop. If you did not start at the beginning you may want to visit Terri's bog and see all the talented people who have posted Christmas cards.

Monday, February 14, 2011

Valentines

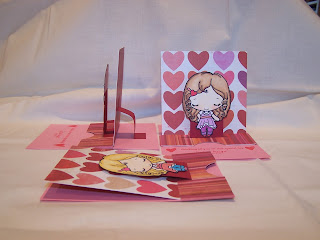
I made these  cards for my grand kids. Using Greeting Farm stamps and Copic Markers. The pop-up idea came from Split Coast Stampers. Had to make a dummy card to figure the mechanics out but then it was a cinch.

Tried to color each figure to look like each grandchild.


And to make things easy they fit into a standard envelope!

Friday, February 11, 2011

Caged Birds Do Sing

A while back I posted this bird and bird cage using Tim Holtz's bird cage die and Perfect Pearls to create a metal finish on the cage. The flower was cut using Tim's Tatered Floral die and dictionary pages. The pin is also from Tim Holt's. Think I'm a fan.


In the next picture I used the same bird cage die and black card stock and lots of glitter. The flowers were premade and purchased at Michael's in the wedding aisle.

Tried to take a close up but it turned out blurry.

Thursday, February 10, 2011

Festive Friday Blog Hop


Welcome back to Festive Friday. Thank you for continuing on and visiting my blog. You should have hopped here from Yolanda's Blog.


This time I took ornaments I made before Christmas (posted in November) and took them apart. I was then left with scraps of Graphic 45 paper (from another project) framed in Maya Road frames (love Maya Road). I covered the holes with gold pearls, added a banner on one and seam bias tape ribbon on another.Viola! easy cards from recycled projects.

Here are some close-ups. Can't go wrong with glitter to make something festive.

Thank you for stopping by. This is the last stop. If you did not start at the beginning you can go to Terri's blog from here.

Sunday, January 30, 2011

Coloring Fun


Well for Christmas (actually after) I treated myself to a few Copic Markers. They are so much fun. The circle picture of the house I colored without a clue as to what I was doing. I had some trouble with bleeding (especially with the blender pen). Then I turned to the trusty internet and watched a few tutorials - and I was off and coloring.

Thursday, January 27, 2011

Festive Friday

Thank you for coming back for week two of our Festive Friday Blog Hop. I loved viewing all the creativity last time. Got some great ideas and encouragement to make more Christmas cards. You probably got to this sight from Katie's blog. Her cards are over the top beautiful. Thank you for continuing on and visiting again.

A few months ago I discovered crepe paper. It is so much fun to work with and very inexpensive. The tree was made with a paper cone. I gathered about 3 yards of crepe paper (on the sewing machine) and glued it to the cone with a hot glue gun. Next time - more rows. The card is embossed (may not show up in the first photo). The rosette is two strips (about 12") of crepe paper gathered on a needle and edged with glitter. The center is a snowflake, bow, and finished off with a pearl.


Here is a close up.

This is the last stop on the Festive Friday Blog Hop. If you did not start at the beginning you can go to Terri's blog and see all the great cards you missed. Thank you again for stopping by.

Tuesday, January 25, 2011

Fun Fun Class


On Sunday I took the most fun class with Terri Brush at the Urban Barn in Escondido, CA. I had taken two other soldering classes but none were as educational or encouraging as Terri's classs. The crown is a good beginners project because you get a lot of practice taping and soldering.  Plus - when you are finished you have a fun piece to take home. Everyone took home a beautiful crown.

The soldered piece on the  bottle I had done long ago.

Anxious to do more....

Thursday, January 13, 2011

Festive Friday


gifninja.com Create custom animated gifs at gifninja.com!


Thank you for visiting after viewing Katie's bog.

I'm excited about participating in a blog hop and creating Christmas cards. Usually I'm glad the stress of Christmas is over and ready to go on to other thing. This year was different. Things got crazy and the usual stuff just didn't happen.
I'm relatively new to stamping (about 2 years) and my stamp collection is limited. The flower below is a modified poinsettia using what I had.


Can't wait to see what everyone else had created. I have visited all the blogs and was very impressed at the creativity and talent. A special thanks to Terri Sproul for ALL her computer help. This is the last stop on our little hop, we hope you enjoyed yourself and come back in two weeks for our next one...

Tuesday, January 11, 2011

New Year - New Post

 I rescued (from the trash) a LARGE box of envelopes from my husband"s office. I knew there must be something to do with them.  I found this idea in a magazine. It's a great little portfolio for ATC's, gift cards, credit cards, frequent buyer cards, or whatever else is about the size of a credit card.


The biggest challenge was creating a closure that would keep whatever is in the pockets from falling out. What I came up with looks OK but surely won't last.